So after days of researching the best GPS tracker out there in the market that suits your needs you zeroed in on Trak-4 mobile GPS tracker and bought it. That’s great, but you are not sure how to start using it. This post covers the Trak-4 GPS Activation and Setup in a simple and straightforward step-by-step process which should hardly take more than 10 minutes.
Without further ado let’s drive straight into the Trak-4 GPS activation process.
Trak-4 Activation
Step 1: Charging
Before activating the device you must make sure the Trak-4 tracker is charged. Use the provided wall charger to charge the tracker for around 3 to 5 hours as recommended by Trak-4.
This is important because you can’t be sure how much juice it has got fresh out of the box.
Step 2: Account Creation
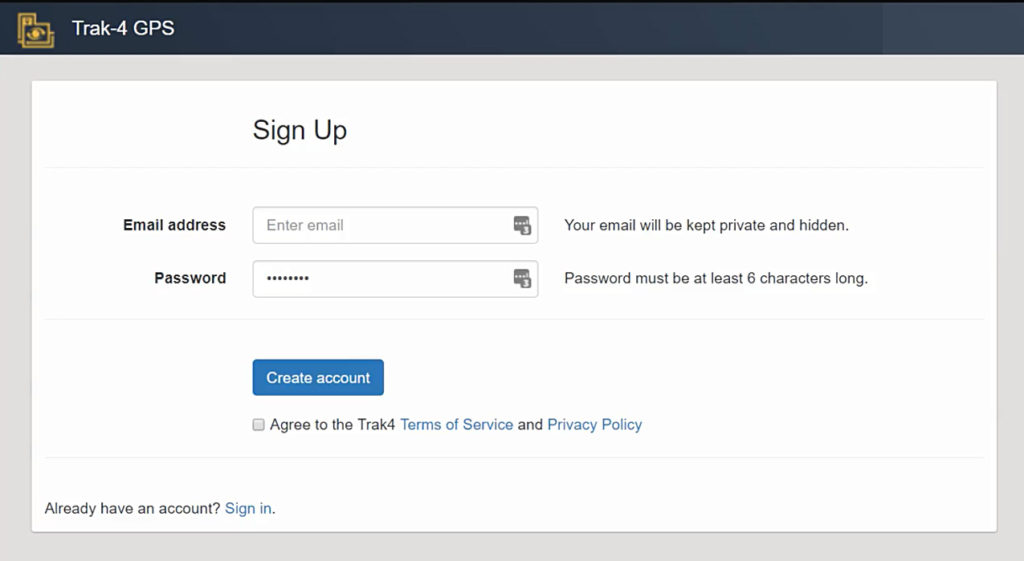
Head over to Trak-4 GPS Login Portal to create a new account.
Verify your account by clicking the link in the email you receive from Trak-4
Step 3: Adding Trak-4 to your account
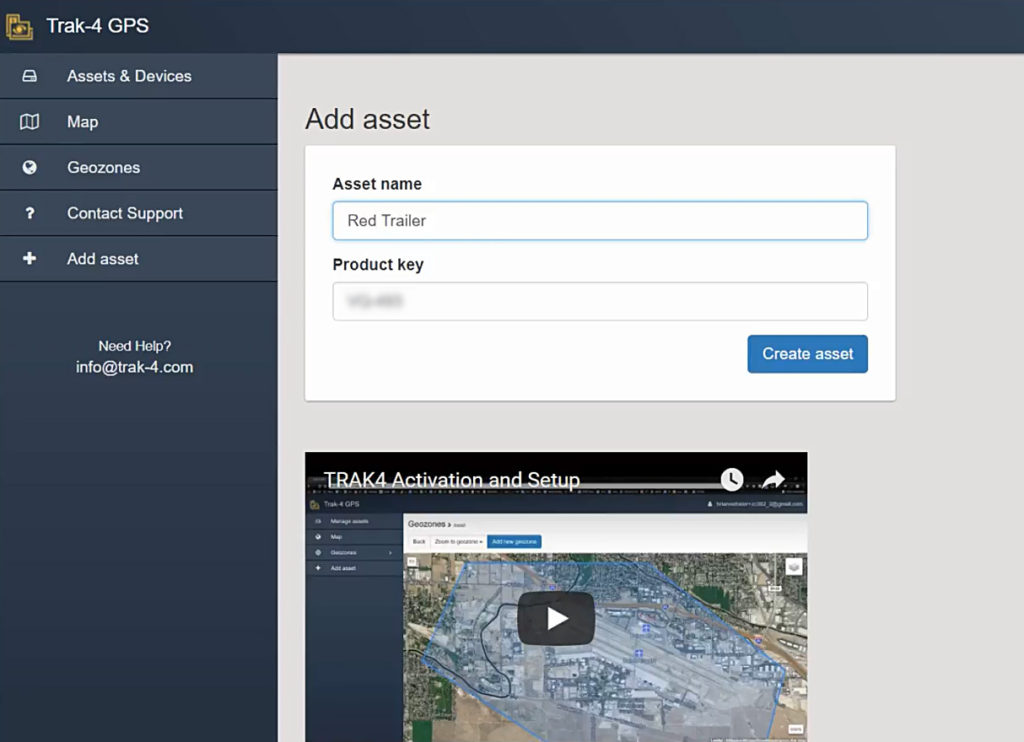
Now we are going to link the Trak-4 Mobile GPS Tracker to your account. To do this login to your account and enter the asset name and product key of your device. Asset name can be used to identify what the device will be tracking, for example Joe’s motorcycle or red Chevy.
Step 4: Choosing a Subscription Option
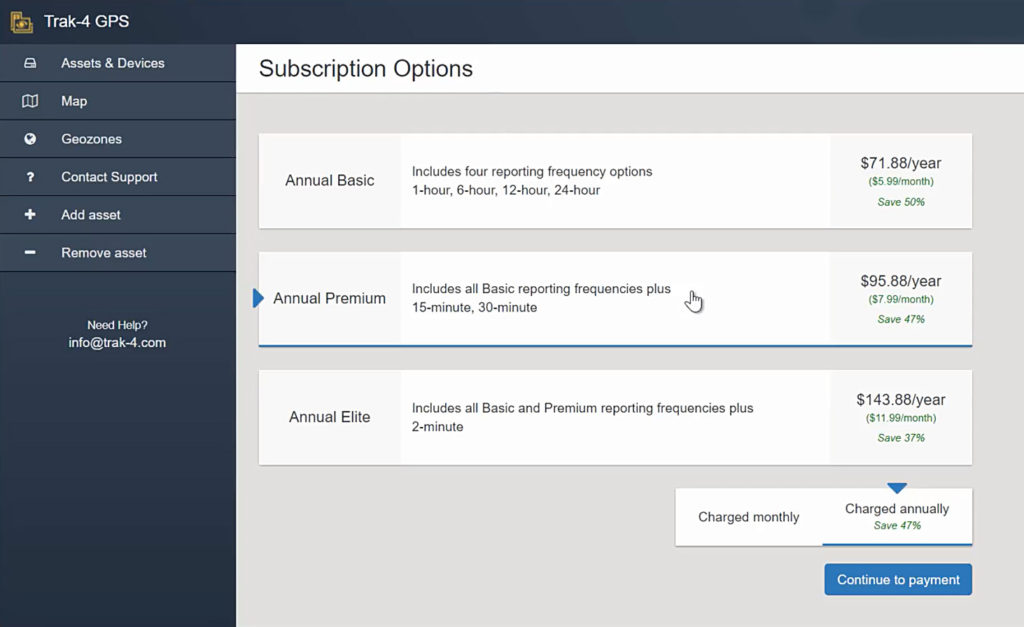
Next you need to choose a subscription plan for your Trak-4 GPS tracker. There are 3 plans namely Basic, Premium and Elite. You can choose to have a monthly or prepaid annual billing cycle.
Here are the different reporting frequency options for the three subscription models.
| Subscription | Tracking Frequency |
| Basic | 1 hr, 6 hr, 12 hr, 24 hr |
| Premium | 15 min, 30 min + Basic |
| Elite | 2 minutes + Basic + Premium |
Step 5: Payment Information:
Once you have selected your desired subscription option, click next to provide payment information. Here you need to enter details such as name on card, card number, expiration date, security code zip code. After filling all the fields click start subscription to submit the payment.
Trak-4 Setup
After your device has been activated, click on the Map tab on the left sidebar of the screen. Your device name should be displaying on the top now. Under the dashboard tab, you can see the satellite map and your device location marked with a blue pin. You can zoom in and out to have a closer look of the surroundings. On the right is the status bar it displays current information about your Trak-4 GPS tracker such as GPS position co-ordinates, local weather, battery status and last and next GPS report time.
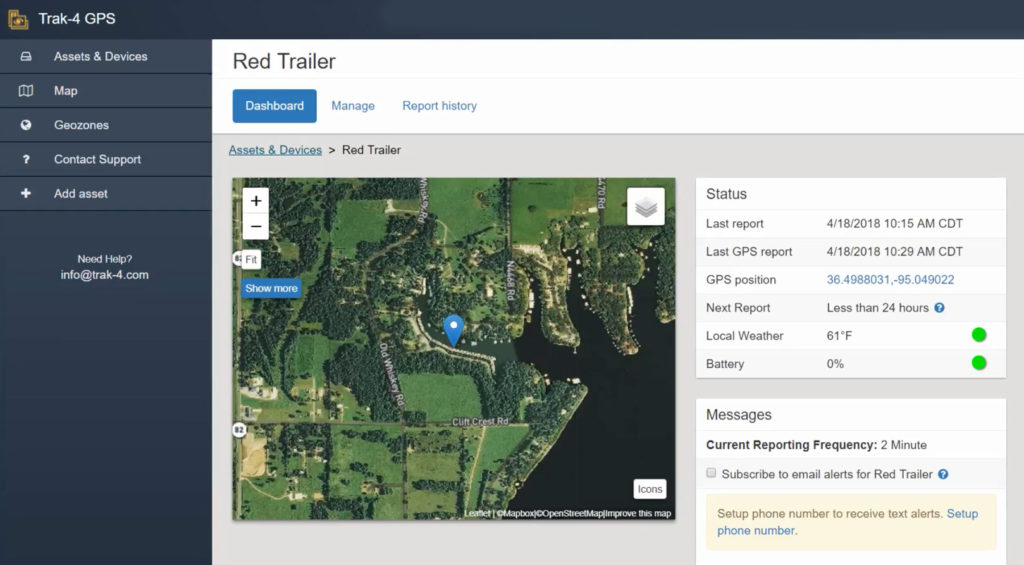
If you click on the Manage tab you will find a number of settings for your Trak-4 mobile GPS tracker. Firstly we are going to set a reporting frequency for the device.
Setting Reporting Frequency:
By default the shortest frequency is set depending on your subscription plan. Keep in mind though the shorter the reporting frequency the lower the battery backup. According to Trak-4 estimates a 24 hour reporting frequency should give you more than 12 months of battery backup on a single full charge. However with 2 minutes ping rate you can expect 2 to 4 days battery life under normal use.
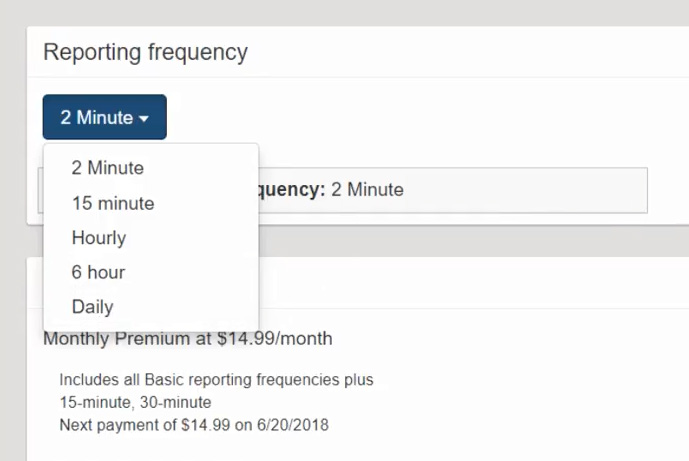
One thing to remember here is that Trak-4 mobile GPS tracker goes to sleep between each location update to conserve power. So when changing the reporting frequency, the tracker will check for any frequency update requests only when it’s due to report its next location update.
To ascertain your GPS tracker’s next scheduled reporting time, click on the dashboard tab. In the status section it shows next reporting time.
Messages and Alerts:
You can choose to be alerted about your Trak-4 movement via email or text message. Click the check box ‘Subscribe to email alerts for [asset name]’ to be notified via email.
For text message alerts you need to provide your phone number. Click ‘Setup phone number’ from the dashboard tab to do that. Now you can check the ‘Subscribe to text message alerts for [asset name]’ from the dashboard.
If you wish to receive low battery alerts, click the batter tab in the status section for dashboard and click the battery tab. Turn on the ‘Alert when less than 20%’ toggle to start receiving low battery alerts.
Geozone Setup:
Geozones are virtual perimeters that you can draw on the map so that whenever your GPS tracker enters or leaves its boundary you will get an alert.
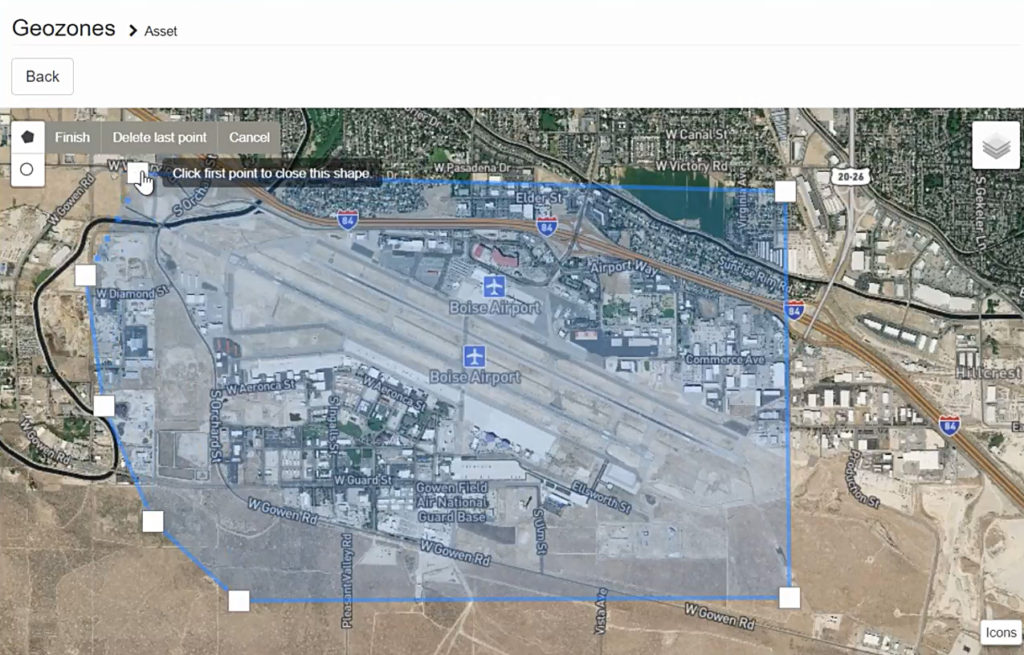
- To setup a Geozone, click the Geozones tab on the left sidebar.
- Select your device from the dropdown and navigate to the location on the map you want to lay down the Geozone.
- Click ‘Add new Geozone’ and start marking points on the map.
- Click the first point to close the shape. Enter a name for you newly created Geozone and check the boxes for entry and exit to receive alerts when the Trak-4 GPS tracker goes into or out of the Geozone.
If you wish to modify your Geozone boundary click on the blue shape and choose edit. You can drag the handles to modify the area. Hit save when you are done.
Reporting History:
The report history tab is the place where you will find the location reports for your Trak-4 mobile GPS tracker. It includes information such as reporting time, GPS co-ordinates, location method (GPS or cell), battery percentage and local weather. You also download this data by click on export CSV button in the top right area.
If the tracking device is able to establish stable connection with the GPS satellites it will report the location co-ordinates with pinpoint accuracy. However if the GPS tracker has no clear view of the sky in the event of it being inside a building or covered with metal, it will use cell trilateration method to report its approximate location. The accuracy of this method depends on the availability and proximity with cell towers in the area.
That’s it. Happy Tracking!
Hope this article helped you activate and setup your Trak-4 GPS Mobile GPS Tracker. Feel free to post your questions and comments below.
