Dash cams provide an added layer of safety and security for drivers and their vehicles whether moving or stationary. Thanks to their continuous recoding, dash cams footage serves as proof and evidence in cases of road accidents, road rage and insurance claims. The first part of this post is about how to access and change VAVA dash cam WiFi password and username settings. Second part gives a step by step procedure for VAVA dash cam firmware update.
VAVA is a popular name in dash cams and monitoring devices. Their camera range includes a bunch of different dash cam models that allow recording in 1080p, 2K, 4K and even dual camera recording. It also has built in GPS allowing you to keep travel logs.
VAVA dash cam WiFi network name change
- Open the VAVA dash cam app on your phone and tap on the settings icon.
- On the settings page tap the WiFi name to change the default name of your VAVA dash cam.
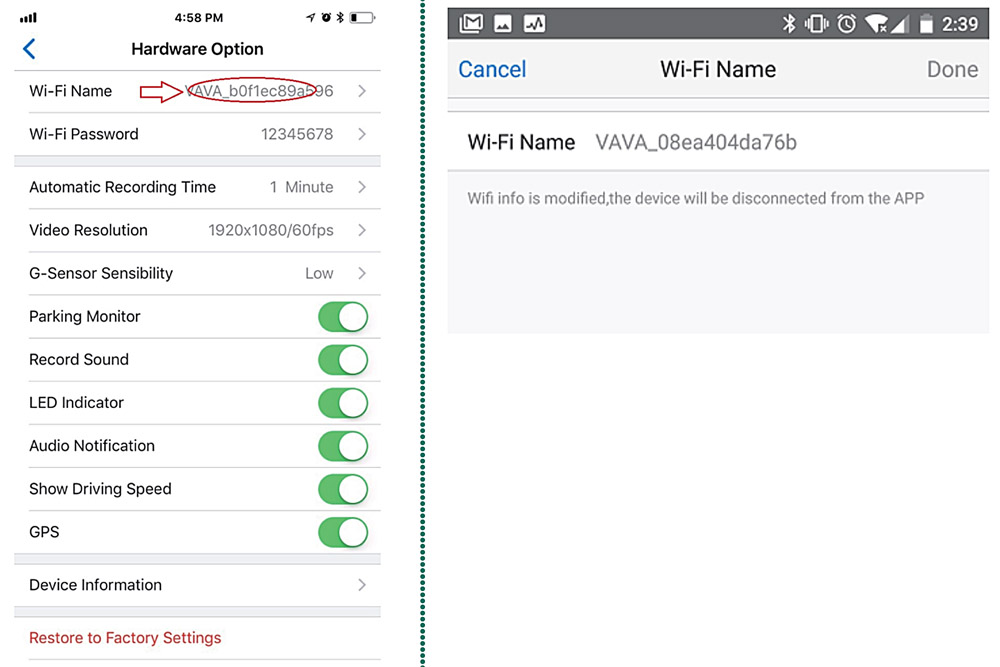
- Please note that after changing the WiFi name your phone app will be disconnected from the dash cam network immediately. You will have to reconnect to the dash cam with the new WiFi name.
VAVA dash cam WiFi password change/reset
- Tap on the WiFi password to change the default password of your VAVA dash cam.
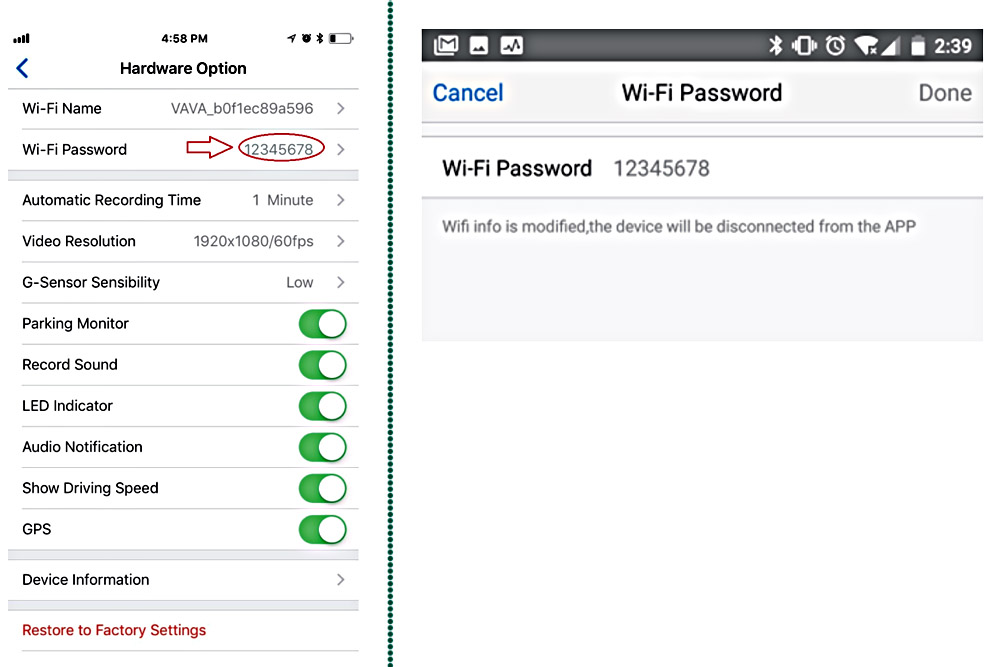
- After entering and saving a new password your phone app will disconnect from the dash cam network. Reconnect the dash cam using the new password you just created. Make sure to save or write down the password somewhere safe for future use.
- If you are a new user of the VAVA dash cam, or have recently reset your device to its factory settings, the default WiFi password is 12345678
VAVA dash cam firmware update
A number of VAVA dash cam users have reported online about not being able to connect their phone to the VAVA WiFi network. A possible solution to this issue can be updating the dash cam firmware. This section covers how to update your VAVA dash can firmware via TF card (also called micorSD card)
PLEASE NOTE: Updating the firmware can be a bit technical process. Doing so in a hurry or without proper safety measures, can cause damage to the device. Please proceed at your own risk. GPSGears.com will not be liable to any loss or damage to your device. It is advisable to go through the VAVA user manual for documentation on the complete procedure.
- Locate the firmware file for your dash cam model on the VAVA product page. The link to the firmware file should be listed below te product specifications section.
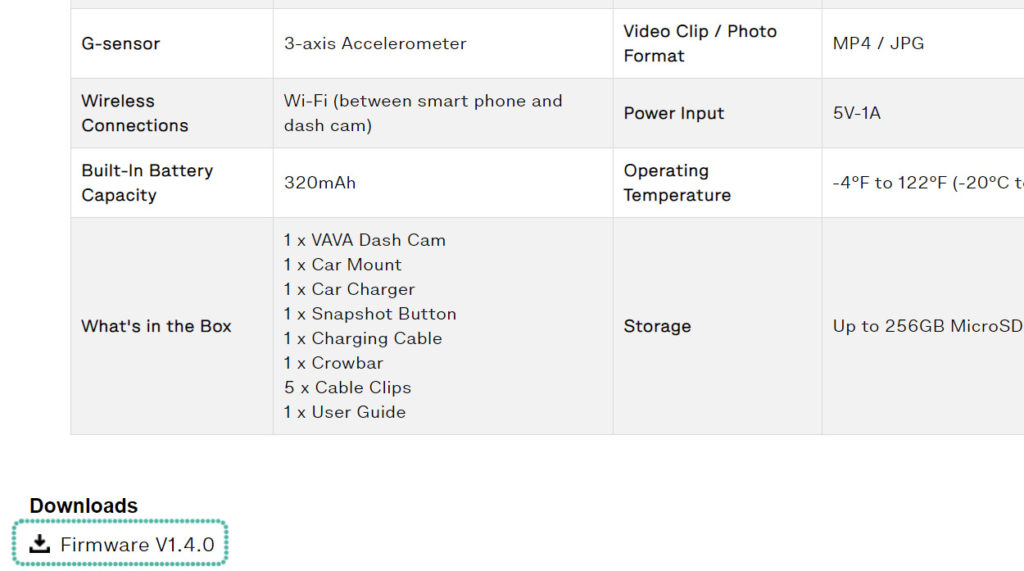
- Download the zip file to your computer. Unzip the folder to get the .bin file.
- Turn off the dash cam and eject the TF card from the back of the device. Connect the card to your computer via an SD card adapter/reader and format it. Please note that this will delete all your saved data on the card so make sure to make a backup first.
- Copy the .bin firmware file to the root directory of the card.
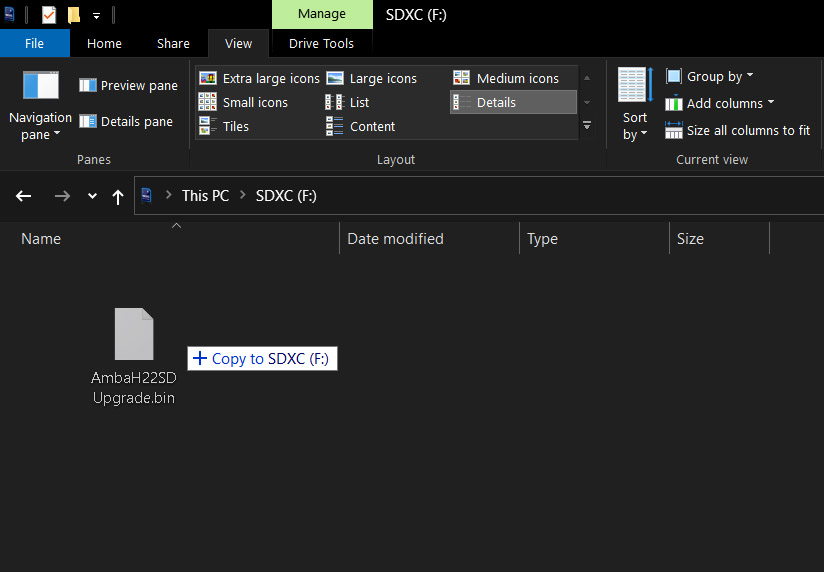
- Reinsert the card into the dash cam and turn it on. The dash cam will start updating the firmware as seen from the flashing lights. The white and purple LEDs will start flashing quickly for about a minute. When the dash cam has finished updating the firmware the purple LED will turn blue and flash periodically.
